Getting Started

Thank you for choosing popcorn CRM to help your grow your sales, faster. 

This page is designed to work in along side your onboarding sessions, to give you faster answers to the most common questions we get asked. 

I want to learn about...

Packages

icons8-contact-500
icons8-holding-hand-500
nurture customer support customer buying cycle
icons8-import-csv-500

Importing/Exporting

Getting your data ready can be a daunting task, but we’ve designed popcorn so your data transference is as simple as possible. Read our handy guides to find out more!


Most importing issues our users face are usually fixed in a few minutes.

The first step we recommend is to export your data into a .CSV file, ensuring that there is only one ‘Sheet’, and to remove any unwanted columns. Doing this usually fixes most importing issues. 

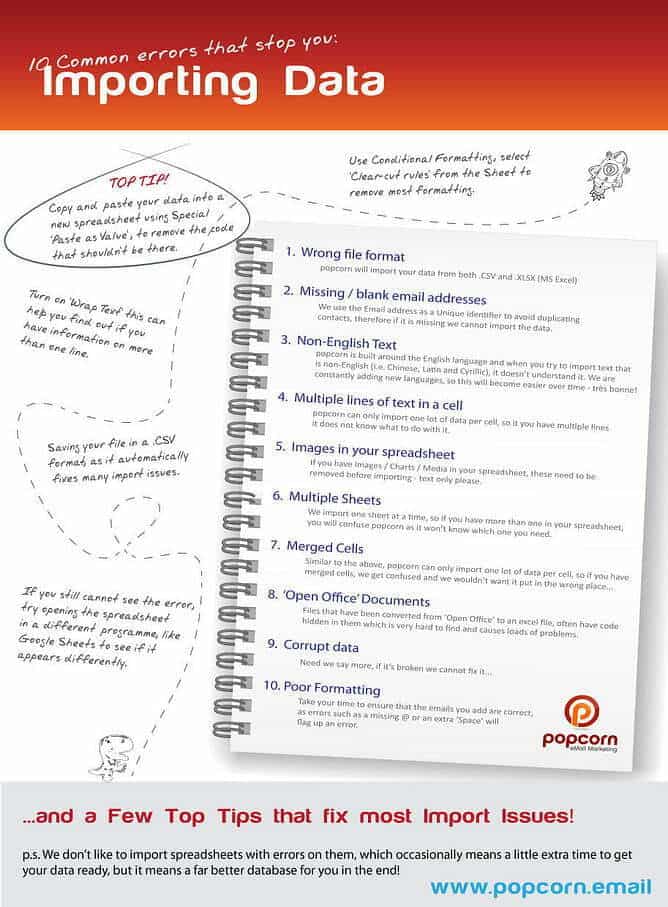
If you’re still worried, we’ve put together a handy guide on ’10 Common Errors That Stop You Importing Data’ to resolve these typical issues before you even open popcorn.

importing data top tips popcorn

Quick check! Have you saved your file as .CSV? This will help you avoid errors when importing!

Importing your data into popcorn is really simple!

  • Export your data from your existing software
  • Import the spreadsheet into popcorn via the New > Import button at the top of every page
  • The importer will then guide you through the easy mapping process.

We are currently developing a connection with Zapier, which will allow us to easily connect to over 3500 applications – so you will be able to quickly and simply move your data around. Keep a lookout for this in 2021…

If your data is spread out over different spreadsheets, you can import all the exported spreadsheets into popcorn, where they will be automatically de-duplicated. If duplicates are found, you will be asked how you want to deal with them: you can either UpdateIgnore or Replace them.

You’ll then have a clean and simple to use database, so you can discover the golden nuggets even faster!

Adding tags to your contacts is a really simple and powerful way of helping you to manage and segment your data.

To add this data before importing into popcorn, simply add a column to your spreadsheet called ‘Tags’ and then add the tags you want to the relevant contact rows. You can separate each word with a comma, to identify the different tags, i.e. Tag1, Tag 2, Tag 3, etc… 

Once you have imported the data it is really easy to add extra tags via the contact popup or in the Actions section.

Watch the video below to see this in action!   


Adding tags via the contact popup

Simple – anything you like!

During the import process, you can map your existing columns to the fields that are already in popcorn, so you can make your sales process exactly how you need it.

Not at all! popcorn has a simple to use mapping tool that allows you to customise your spreadsheet columns within the fields popcorn provides. There are 10 customisable fields for you to take advantage of, too.

Top Tip! When importing your data, it is best to export your data into a .CSV file, as this removes hidden code (unicode) inside Excel spreadsheets and can cause errors when importing.

popcorn will automatically de-duplicate your data as you import it, flagging up duplicates at the end of the process.

At the same, popcorn flags up any lines of data that it could not import. You’ll then be able to download a spreadsheet with all the excluded data, including explanations for why each item wasn’t able to download. 

Currently popcorn de-duplicates based upon email address – but stay tuned! We are looking to upgrade this in 2021

Check your SPAM folders, this email often gets caught up due to the bit of code (Token, for the fellow geeks out there) we have to put in there to activate your account. 

If you still can not find it, please use this link to re-send a new one. 

RESEND ACTIVATION LINK

Setting up the website tracking is exactly the same as setting up Google Analytics, simply paste the code from the below page into your website header and you are up and running. 

GET WEBSITE
TRACKING CODE

popcorn automatically generates an invoice for you, shortly after the payment has been received. Once logged in, simply click the link below to view and download a PDF. 

VIEW INVOICES


As well as the guides lower down the page, we also offer the following:

A FREE bite sized training course on how to build a qualified sales pipeline using CRM and Email Marketing

FREE TRAINING COURSE

Loads of click by click ‘How to’ videos. 

GETTING STARTED GUIDES

Once you have filtered your contact, you can click the Action button to turn your data from being static to dynamic. Now it can be targeted or moved around to different parts of the system. 

Actions include the ability to add/remove contacts from:

  • Sales Pipelines
  • Tags
  • Campaigns 

or simply:

  • Send a quick email 
  • Unsubscribe from email marketing
  • Delete a contact from your database


Packages

icons8-contact-500
icons8-holding-hand-500
nurture customer support customer buying cycle
customer buying cycle customer single user

My Account

Common Questions we get asked when using the ACCOUNT section of popcorn 

Check your SPAM folders, this email often gets caught up due to the bit of code (Token, for the fellow geeks out there) we have to put in there to activate your account. 

If you still can not find it, please use this link to re-send a new one. 

RESEND ACTIVATION LINK

Setting up the website tracking is exactly the same as setting up Google Analytics, simply paste the code from the below page into your website header and you are up and running. 

GET WEBSITE
TRACKING CODE

popcorn automatically generates an invoice for you, shortly after the payment has been received. Once logged in, simply click the link below to view and download a PDF. 

VIEW INVOICES


As well as the guides lower down the page, we also offer the following:

A FREE bite sized training course on how to build a qualified sales pipeline using CRM and Email Marketing

FREE TRAINING COURSE

Loads of click by click ‘How to’ videos. 

GETTING STARTED GUIDES

Packages

icons8-contact-500
icons8-holding-hand-500
nurture customer support customer buying cycle
crm icon

CRM


CRM is at the heart of the popcorn service. It allows you to set reminders, tags, information for your contacts and set up email campaigns.


Searching for an individual contact inside of popcorn is quick and easy. Simply click into the search bar at the top right of every page, and type in the person’s details such as their:

  • name
  • email
  • company
  • phone number
  • something from in their notes.

Clicking on the right person will take you straight to the contact information popup!

It’s much faster to add an individual contact via the New > Contact button at the top of every page. Once clicked, it will give you a blank contact popup for you to fill in.

Currently, the only required field is an email address – but we’ll be removing this limitation in early 2021.

Tags are a great way to summarise and categorise your contact. As well as visually reminding you of your contact’s qualities, it also allows you segment, filter or search your data!

You can then apply these searches using the Action button. Interact with the question below to find out more about this little trick.

To manually add a tag, just click on the Details tab of the contact popup. You can either click on one of the previously used tags (bottom right) or start typing in the search box (above existing tags). When you start typing, the existing tags will display the relevant selection – or you can add a new one, by clicking on the plus (+) symbol in the search bar. 

If you are looking to add tags to a larger group of contacts:

  • Click into Contacts
  • Apply a filter (read more on segmenting and filtering below)
  • Select the contacts you want to add the tag
  • Click Actions > Add the tag you want to apply from the dropdown.

By monitoring your contacts’ activities, popcorn will automatically rate your contacts’ engagement and give you a prospect list to follow up on.

Adding a note and a reminder is simple process:

  • Find the contact you need
  • Type the reminder into the notes section of the contact popup and then click on the clock icon (bottom right of the notes field)
  • Select the time and date of the reminder
  • Add your note to the timeline.

You will see that the notes now has a red time/date in the bottom right. To edit this, simply click on the clock icon next to it. 

You will get a reminder delivered to your inbox 10 minutes before the scheduled time. If you would like to turn this on or off, go to Account > Notifications. A list of all your reminders can be found via the Tasks tab at the top of the page. 

Once you have filtered your contact, you can click the Action button to turn your data from being static to dynamic. Now it can be targeted or moved around to different parts of the system. 

Actions include the ability to add/remove contacts from:

  • Sales Pipelines
  • Tags
  • Campaigns 

or simply:

  • Send a quick email 
  • Unsubscribe from email marketing
  • Delete a contact from your database


Packages

icons8-contact-500
icons8-holding-hand-500
nurture customer support customer buying cycle
building contact us company icon

Company

Copy needed 

Watch this space… 

Packages

icons8-contact-500
icons8-holding-hand-500
nurture customer support customer buying cycle
pipelines filter icon

Sales Pipelines

Sales pipelines give you the ability to recreate your sales process in a highly visual and customisable way.

You can find them both on the Dashboard and under the Pipelines tab at the top of the logged in page.

A sales pipeline is visual representation of the journey a contact makes to become a customer and beyond. Think about and plan the key steps you take during this process.

You can create a pipeline for each step. popcorn’s pipelines are interactive: that means you can drag your contacts from one stage to another. Doing this allows you to see exactly who is at which stage and more importantly instantly get a visual overview of the opportunities, prospects and customers, allowing you to mange your sales easily.

popcorn allows you to add/name as many columns as you need to re-create your sales process – plus, you can reorganise these at any time to suit your business’ flexibility! On top of that, popcorn allows you to filter the contacts to just show hot, warm and cool leads. 

If you are on the Nurturing package, you can then quickly and easily send an email to all the contacts in that sales pipeline, by clicking on the  at the top of the column. 

Creating a customisable pipelines allow you to easily mirror your real world process into popcorn. You can create as many pipelines as you need, then add as many or as few steps (columns) into this process. Everything is always highly visual and you can simply re-name, then drag both columns and contact to ensure that they match your personal processes.

To create a new pipeline simply click on campaign you want to edit, then click the ‘add’ new column button on the right and side of the page, name it and then drag it into the position you require. To rename the pipeline click on the three dots at the top and click edit.

Adding a contact to a sales pipeline can be done in two ways:

Via the campaign pipeline:

Click the blue ‘ADD prospect’ button on the top right hand side, above the pipelines
Search for the contact by name in the pop-up box
Select the pipeline and the position that you would like to add them to
Click Add and the contact will appear in the relevant pipeline
Or:

When inside the contacts pop-up, click on the Targeting tab at the top
Select the pipeline you want to add them to. The drop downs at the bottom right and corner of the screen will give you a selection for you to choose from


To manually add a tag, just click on the Details tab of the contact popup. You can either click on one of the previously used tags (bottom right) or start typing in the search box (above existing tags). When you start typing, the existing tags will display the relevant selection – or you can add a new one, by clicking on the plus (+) symbol in the search bar.

If you are looking to add tags to a larger group of contacts:

  • Click into Contacts
  • Apply a filter (read more on segmenting and filtering below)
  • Select the contacts you want to add the tag
  • Click Actions > Add the tag you want to apply from the dropdown.


Managing the contacts within your sales pipelines can be done in two ways:

Drag and drop – drag and drop your contacts to adjust the order or pipelines you wish them to be in.

Column filters – click on the Drop Down button beneath the  of the column you wish to filter. You’ll then have the option to filter based upon prospect level (hot, warm, cool, cold and recent) – plus the ability to search based upon contact name.

Sending an email to the whole of a sales pipeline is simple, with these methods:

In your sales pipelines – Click on the three dots () at the top of the pipeline and select Email. This will add all the contacts to a email ready for you to send. 

Or:

Using the filters tool:

  • Select the dropdown Advanced > Pipeline
  • Click Add
  • Click on the grey box to select the pipeline you want
  • Once this is done, click Filter, this will show everyone in the pipeline
  • You can then use the Actions button to send them an email


Packages

icons8-contact-500
icons8-holding-hand-500
nurture customer support customer buying cycle
alarm clock reminders icon

Reminders

With reminders, you’ll never miss out on an opportunity again.

Add reminders to your notes to get an email notification. You can also view your reminders all at once, as either a clean and visual list, or as daily/ weekly/ongoing activity.

Adding a reminder is a straightforward process:

  • Click on a contact’s name to bring up their information
  • Add your note/reminder
  • Next to the Add button you can see an alarm clock icon – clicking this will allow you to add a reminder time and date
  • Once set, add your note and you will then see the reminder details to the bottom right of the note in the timeline

Adjusting your email reminder notifications is really simple. Once logged in, go to Account > Tasks and check the box to turn them on or off. 

To find your reminders you can either:

  • Use the Tasks tab to see a chronological list of all the reminders. These can easily be displayed as today/week or overdue tasks.

Or:

  • Use the search box in the top bar to search for keywords in your notes. They will then be displayed in the dropdown box
  • When you click on the note you want, it will pop the contact’s details up for you!

Packages

icons8-contact-500
icons8-holding-hand-500
nurture customer support customer buying cycle
phone call

Call Tracking

Easily track and see how many calls both you and your team have made over a given period of time. Then in one click generate a quick report to see exactly who has been spoken to, what was said and if there are any follow up actions set. 

Watch this space… 

Packages

icons8-holding-hand-500
nurture customer support customer buying cycle
attract customers lead generation email marketing customer buying cycle

Lead Generation

The lead nurturing side of popcorn expands upon the CRM package, giving you the ability to track and automate prospect engagement, identify the hot prospects and nurture them through your sales process.

This FREE Training course is built on the back of a series of half day workshops that popcorn have been running for the past 4 years.

We have developed a proven 10-step course that will take you through the practical steps of how you can use email marketing to identify new leads, qualify prospects and then use a CRM to manage them through your sales process.

This course is designed to help you to develop an amazing email strategy and build a strong sales pipeline so that your business is ready for growth.

Click below to find out about the course content!

Take me to the Training – Click HERE

Personalising the number of hot, warm, cool leads that appear in popcorn can easily be done by going to Accounts > Smart Scoring. A range of default scores are automatically put in there, but you can adjust these so that you generate more or less prospects. This includes adding additional specific pages that are monitored and scored.


popcorn allows you to have greater visibility of all the actions you’ve taken in the CRM, by joining up all the essential bits of software a small business uses. Therefore, you can easily segment your data and organise your contacts – not only based upon tags but, on engagement across email marketing, website, tasks, etc.

To filter your contacts, you can click on the filtering tab that appears at the top of every list of contacts inside of popcorn.

You can select any one of the below, or a combination to narrow down your result further:

  • Prospects: Hot, Warm, Cool
  • Subscription Status
  • Activity Dates
  • Email Opens/Not Opens
  • Email Clicks/No Clicks
  • Specific Webpage Visits
  • Task Due
  • Recent CRM Activity
  • Dates Added to System
  • Campaign Activity 
  • Tags Included/Excluded

One of the key features in popcorn is lead generation, which is done automatically by tracking of your contacts’ engagement across email marketing, website activity, and prospect scoring. The scoring can be personalised via account settings so you can generate the right type of prospects specifically for your business.

The prospects are automatically separated into hotwarm, and cool prospects. 

To quickly identify these prospects, you can click on the quick reports in the dashboard. From there, popcorn can break down the information for you further. You can see individual contacts this way, but you an individual’s score will always be seen on the contact’s profile, in a circle in the top left-hand corner of the popup.

Whenever you add a new prospect pipeline in your sales pipeline, your prospects will be added automatically! Once in a pipeline, contacts will have a coloured key line around the tab easily identifying the level of prospect.

When popcorn automatically identifies a prospect, it will add the contact to a new prospect column in the sales pipelines. The contact will have a coloured outline denoting how hot it is, so you know who to follow up on first. 

popcorn tracks your contact’s interactions with both your email marketing and your website, monitoring every page of you for up to 3 months after opening an email.

We do this with confidence as we create a unique fingerprint (based upon IP address and MAC address). When we see your contact’s ‘fingerprint’ appear on your website, popcorn will generate that in a history list for you to take advantage of.   

As you move your contacts along your sales pipeline, you’ll find that some move faster than others.

But this is where you can use popcorn’s built-in nurturing tools to speed up the process!

Using the automated lead generation, segmenting and filtering tools, popcorn can help you identify contacts who are engaging around specific subjects. With this, you can get busy securing those prospects!

popcorn’s built-in email marketing tools will enable you to generate and track additional engagement, driving more prospects and greater intelligence.

Or, popcorn will give you a specific and targeted list so you know exactly who you’re going to phone – and most importantly, why it’s worth the effort.

Using popcorn‘s automated lead generation, you can quickly identify the contacts who are hot, warm or cool, based upon their engagement across email marketing and website activity.

You can then choose how to target these prospects based upon how engaged they are. For example: you may want to pick up the phone and call a hot prospect, target one prospect with email marketing, or simply move warm prospects into a monitoring column in your sales pipeline.

To identify these prospects, you can use the Report section on the dashboard, manage them via your prospect pipelines, or use the Filtering tool at the top of every list of contacts.

Although popcorn automatically monitors and score contact activity across email marketing and website activity, you can also set up your own automation to help narrow down the right prospects for you. For example, they might be contacts who engage in specific ways on your website or email marketing, or could have actions applied to them in the sales pipelines/campaigns or birthdays to bring up their engagement.

When these actions are identified, you are then able to trigger specific events to happen, such as:

  • Sending an email
  • Adding reminders
  • Applying/removing tags
  • Progressing or removing from sales pipelines
  • Adding or being removed from campaigns

When these rules are applied, contact engagement will increase – and so will their score, improving their prospect rating. As those prospects get warmer, popcorn will move it along your pipeline for you!


When you apply automation to a campaign folder, you are able to set up triggers to specific actions – for example, automatically moving your contacts into different pipelines. It’s up to you what their purposes are within popcorn, but by setting up rules you can be sure to have a clear and simple visual of where everybody is in your sales process.


Packages

icons8-holding-hand-500
nurture customer support customer buying cycle
r2d2 automation icon

Automation

popcorn’s automation features allow you to lift your foot off the pedal on your CRM. By setting up your automation, popcorn will take over tasks that make up your sales process, giving you the time and space to smooth out and expand your engagement.


Packages

icons8-holding-hand-500
nurture customer support customer buying cycle
letter icon email marketing icon

Email Marketing

Highly visual and simple tools such as popcorn’s drag + drop editor, spam filter checking, with full integration – ideal for nurturing sales prospect along their pipelines.

A single email is perfect for sending a standalone email to one or many contacts.

With a campaign folder you can mange a group of contacts around a specific topic; sending email marketing, identifying prospects, adding automation and setting up landing pages. 

Watch this video to learn how you can quickly and easily set up your first email, including how to add your contacts and use the email editor. 


Want to create some exciting emails but not really sure where to start? In this video, popcorn founder Simon shows you some of the basic steps in order to create fantastic-looking template for your emails. Keep it simple whilst making it look professional!


Details to follow

There is nothing more frustrating than designing a stunning email, only to have to recreate it again and again and again. Luckily, popcorn’s simple email templating tool allows you to quickly save and re-use email designs – all in the click of a button!

Once you have saved your email, click on the Save as Template button beneath the editor. This will then save it with your subject name and time/date as a reference, so you can always see which is the latest version. To re-apply the design, open a new email and click the Use Template button beneath the editor. Once this has loaded, you can simply start re-editing your design. 

Email marketing gives you amazing reporting and insights into customer behaviours. There are two different types of reporting in popcorn, both of which allow you to drill down in the specific detail, by clicking on any statistic or specific contact action:

Quick Reports – this is the top level reporting that allow you to see overviews for your contact, and can always be seen at the bottom of a sent email or on the overview card in the Campaign list. 

Advanced reports – the Filters button can be found at the top of any contact lists in popcorn, and this is where you can start segmenting based upon a multitude of different categories – filters, including prospect levels, email opens, website visits, reminders, activity dates, etc… 

popcorn allows you to have greater visibility of all the actions you’ve taken in the CRM, by joining up all the essential bits of software a small business uses. Therefore, you can easily segment your data and organise your contacts – not only based upon tags but, on engagement across email marketing, website, tasks, etc.

To filter your contacts, you can click on the filtering tab that appears at the top of every list of contacts inside of popcorn.

You can select any one of the below, or a combination to narrow down your result further:

  • Prospects: Hot, Warm, Cool
  • Subscription Status
  • Activity Dates
  • Email Opens/Not Opens
  • Email Clicks/No Clicks
  • Specific Webpage Visits
  • Task Due
  • Recent CRM Activity
  • Dates Added to System
  • Campaign Activity 
  • Tags Included/Excluded


popcorn was designed for you in mind – so we stuffed as much personalisation in there as we could!

All of your personalisation is synchronised through popcorn’s CRM system, so any information you’ll need for your email marketing will be automatically pulled through.

To add personalisation, drag a text block into the email editor and click in it to begin editing. A black box will appear containing all of the editing options and Merge Tag field. Here you will be able to select from your standard personalisation tools, plus 10 custom fields.

Please note that personalisation will only be inserted when the email is sent properly, and will not show up during testing emails.

Watch our video to see it all for yourself! 


To add a newsletter sign-up form to your website, visit Accounts > Newsletter and copy & paste the code to the HTML section of your website.

If you want to direct signups to specific campaign folders, simply select the campaign folder from the dropdown box and you will see the code refresh. 

This form allows you to capture the user’s full name (will automatically separate first and last name in popcorn), email address and phone number. 

To customise your Unsubscribe Confirmation page, visit Account > Unsubscribe. Here you can add customised text and your logo, to reassure contacts that you are who you are and reduce unsubscribe rates. 

Watch the video below to see it all for yourself!

To add your contacts to an email:

    • <li “=”” class=” class=” data-css=”tve-u-1764306e27d”>
On the third step of the Creating a Single Email page, click Update
  • popcorn will give you a pop-up of all your contacts
  • You can choose to Select All or use the Filters button to segment your data
  • Once you have your selection, click Select All  and Update
  • This will now display the original screen and in Step 3 you will see three new figures:
  • 1: the total number of contacts selected
  • 2: the total amount of emails that will be sent out (excluding unsubscribes and contacts without email address)
  • 3: the number of contacts in popcorn that are still available to add. 
  • If you want to remove one or all contact, re-click Updatemanually un-tick the names you want to remove or – click Select All twice to remove the ticks from all the boxes.
https://youtu.be/q5FCge7NcW4
 

Content to follow shortly, please contact support for more details 

Packages

icons8-holding-hand-500
nurture customer support customer buying cycle
internet website tracking icon

Website Tracking

popcorn’s unique fingerprinting tool allows you to track your contacts whenever they visit your website, up to 3 months after opening your email. 

Don’t worry, we’re not asking for rocket science. Like Google Analytics, all you need to do is paste the code from the below page into your website header and you are up and running. Easy as pie!

GET WEBSITE TRACKING CODE


popcorn’s unique tracking tools follow your contacts from email over to your website – even on return visits!

If you click onto a contact that you have previously sent an email to, you can see the exact pages that they have looked at on your website. This history goes up to 3 months after the last email they opened.

Once you have installed the website tracking code, you can see the exact pages that your contacts have been looking at – up to 3 months after they have opened an email from you. 

Viewing their statistics can be done in three ways:

  • Click on a contact’s name to bring up their information and then scroll down through the activity timeline for an in-depth view.

Or: 

  • Use the Filters button at the top of a list of contacts
  • Select the Advanced dropdown > Website > Add
  • Click on the grey Website box that appears, selecting/searching for the website you are looking for
  • Once you filter this information, it will show you all your contacts that have looked at a specific page

Or:

  • Via the dashboard, click on the dropdown in Quick Reports
  • Select Website Activity

This will show you all a quick report of the total number of visitors to your site over the last 7 days, including the number that are being tracked. popcorn also provides extra information, such as how many visits per page you’ve received, and the specific visitors to those pages. 


All landing pages generated inside popcorn are saved on the popcorn platform, and do not affect your existing website. The website address for these will have a popcorn address and will not be found on Google.

Packages

icons8-holding-hand-500
nurture customer support customer buying cycle
browse page landing pages icon

Landing Pages

Your customisable, personalised landing pages will solidify your brand presence and professionalism to your customers. 


If you have permission to clone a webpage, you need to:

  • Click into in a campaign folder
  • Click on the landing pages tab at the top right
  • Click New Landing Page
  • Paste the full URL (including HTTPS://) into the website address field
  • Click Copy

The next step will take between a few seconds and a few minutes, to create a copy of the webpage you pasted in. Once this has finished the import you will then be able to click into it and edit text and images as you would with a normal editor. You can also dragon new elements such as photos, videos et cetera from the right-hand tool bar.

To increase engagement, you can also add personalisation (name, company, custom fields, et cetera), by clicking on a text block and using the merge tag field that appears in the text later.

Please note this feature works on 95% of webpages. If you are struggling to make this work, please try cloning a simple page from your website.

To find a link for a landing page you have created, simply click on the Landing Page tab within the campaign you’re working in and then click the Copy URL button on the relevant webpage tool. You can then paste the link or use it within an email.


We don’t interfere with the hard work you’ve put in already. The website cloning tool does not change any aspect of your live website – it simply creates a copy inside of popcorn and makes it editable. This webpage will only be visible to people you provide the link to!


All landing pages generated inside popcorn are saved on the popcorn platform, and do not affect your existing website. The website address for these will have a popcorn address and will not be found on Google.

When popcorn clones a page from your website, it reproduces all of the links to go back to your original site, even if they were internal links before. This way your contacts experience complete brand consistency, no matter where or how they interact with you.


The popcorn landing pages work seamlessly with the email marketing and CRM, which means you are able to customise (with their name, your company, customise fields, et cetera) these pages. If a contact who visits the page has been tracked in your CRM, it will then display the relevant personalisation for them.

To add personalisation:

  • Click on or add a text box to the page, then click inside the box to edit the text
  • When you do this an editor box will appear near to where you are typing and have a button called Merge Fields
  • By clicking on this you can select the desired personalisation which will be added to the website page

Packages

nurture customer support customer buying cycle
letter icon email marketing icon

Multi User

Add additional users and accounts, that can easily be managed from your admin account – Helping you keep all your data and notes in one place, whilst giving you the ability to restrict access and services. 


Watch this space… 

popcorn global awards 2020 2021
popcorn dyslexia awards 2020 winner
business masters 2021 west midlands shortlisted popcorn
west midlands business champions finalist

Are you ready to get started with popcorn CRM?

*FREE 5 Day Trial of popcorn CRM, then £5+VAT per month. No Set-Up Fees, No Contracts, No Hidden Costs